Discussion Overview
The discussion revolves around finishing a wood shelf project to match bathroom decor, focusing on techniques for painting and sealing plywood, as well as considerations for using melamine. Participants explore various methods and materials, sharing their experiences and preferences regarding aesthetics and functionality.
Discussion Character
- Exploratory
- Technical explanation
- Debate/contested
- Mathematical reasoning
Main Points Raised
- One participant inquires about using a sealant coat over spray paint to achieve a smooth finish on plywood.
- Another participant suggests considering melamine instead of plywood, citing aesthetic concerns with plywood grain showing through paint.
- Concerns are raised about the skill level required for working with melamine, especially for curved designs.
- Participants discuss the importance of applying multiple coats of paint and sealing the back of the shelf to prevent moisture absorption.
- One participant proposes using wood glue to seal and fill gaps in plywood ends, while another agrees it could provide a good finish.
- There are suggestions for using grain fillers and specific primers to achieve a smooth surface before painting.
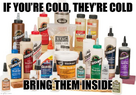
- Some participants express skepticism about the reliability of frozen wood glue, while others share personal experiments indicating it may still be usable after thawing.
Areas of Agreement / Disagreement
Participants express differing opinions on the best materials and methods for finishing the shelf, with no consensus reached on the superiority of plywood versus melamine or the effectiveness of various sealing techniques. The discussion remains unresolved regarding the best approach to achieve the desired finish.
Contextual Notes
Participants mention specific brands and products, but there is no agreement on the best practices for sealing or painting plywood. The discussion includes various personal experiences and anecdotal evidence regarding the use of frozen glue and its effectiveness.