LightningInAJar said:
I don't suppose they make rotating filter holder that can quickly flip between filters right in front of lens for such a specialized task?
When imaging the sun, use the filter (you mentioned that you have and use a solar filter). I advise that you don't risk overheating your sensor and optics by imaging the sun without it.
Instead, here's a way you can get a rough, yet fairly accurate answer to your original question:
(
Optional step 0: If your camera/software supports it, set up your camera to record/display images in monochrome [black-and-white]. While this isn't absolutely necessary, it will make measurements easier.)
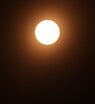
Step 1: Sun's acquisition:
Image the sun as you normally would
with the filter. In this image, the sun's disk should not be saturated. In other words, the detail of the sun should be clear, and not blown out. It's okay of the surrounding sky is dark.
Take note of the exposure time used.
Also take note of the approximate pixel values of the sun's disk (this will be easier if the images are being displayed in black-and-white). If you don't have access to pixel values, look at your histogram. You should see a little blip on histogram corresponding to the sun. The sun will correspond to the right-most part of the curve that's not zero valued. The magnitude of the blip (on the vertical axis) depends on your focal length and sensor size. The larger the sun's disk is relative to the entire frame, the larger the height of that blip will be. Take note on where in the histogram (on the horizontal axis) that blip is. It should be somewhere roughly in the middle of the histogram, more-or-less.
Step 2: Sky acquisition:
Don't change anything, except for the direction your camera/lens/scope is pointing. Move it away from the sun such that it points to a blank area of sky (such that the sun, or anything else, is not in the frame). Do not change the camera's gain/ISO. Leave the filter on.
The only think you're going to change (besides the direction) is the exposure time. You can expect it to be significantly longer for the sky shots.
Increase the exposure time such that the pixel values of the sky image match those of the sun's disk in the previous image (again, this will be easier if you're working with black-and-white). The histogram for the sky image will be a simple spike. As you increase the exposure time the spike will move to the right on the histogram. Adjust your exposure time such that the spike is near the location (on the horizontal axis) where that blip was on the sun exposure shot.
Take note of the exposure time for the sky shot.
Interpretation:
Divide the exposure time of the sky shot by the exposure time of the sun shot, and that's difference in intensity between the sun and the sky. This method isn't necessarily the most accurate method, but it should give you a good ballpark value.
If you want to convert that to "stops," like those used in conventional photography, you can calculate that using
\mathrm{stops} = \log_2 \frac{T_{Sky}}{T_{Sun}} = \frac{1}{\ln 2} \ln \frac{T_{Sky}}{T_{Sun}},
which is approximately
\mathrm{stops} \approx 1.443 \left( \ln \frac{T_{Sky}}{T_{Sun}} \right).