Confidence in FEA stress values?

In summary: This means a sufficiently fine mesh in critical areas, and a coarse mesh in low stress / noncritical areas.
  • #1
Nathanwest58
12
4
TL;DR Summary
How can I be reasonably confident that FEA is giving me reasonably accurate stress values?
Hi all,

I’m trying to get a better understanding of ANSYS as I don’t have a lot of experience with it. My question is with respect to a static structural analysis of a solid part: “how can I be reasonably confident that FEA is giving me reasonably accurate stress values?

I’ll analyse a cantilever beam of length 1000mm, with a base of 50mm and height of 25mm. A 1000 N load is applied at the free-end of the beam. Young’s modulus is 200 GPa.

beam dimensions.png


I calculate a bending stress of 192 MPa at the fixed end, and a deflection at the free-end of 25.6mm. Total strain energy is 12.8 J.

I add total deformation, equivalent stress, and strain energy as solution outputs. I don’t apply any mesh methods or controls and just let the software do its thing for the first run, and it produces the following mesh.
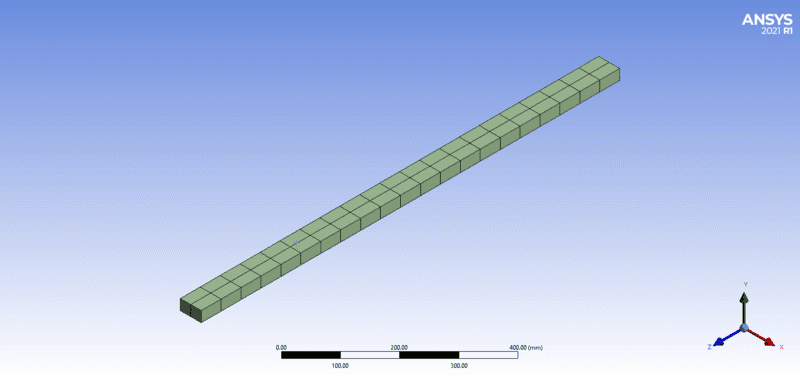
mesh.png


Running the solver and I’ve tabulated my calculations compared to ANSYS results.

Calculated
ANSYS
Difference
% difference
Deformation (mm)25.625.50.10.4%
Stress (MPa)192183.18.94.7%
Strain energy, total (J)12.812.70.10.8%

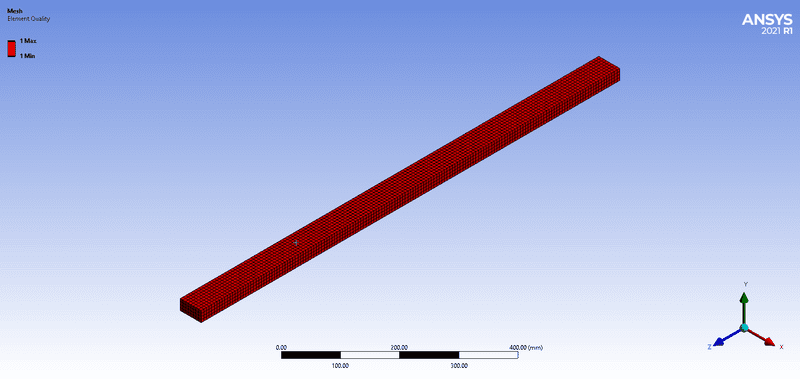
The difference in stress is approximately 5%. Not too big a deal as the material yield stress is 250 MPa. I check the element quality.

element quality.png


All elements have the same quality of approximately 0.74, and I’m assuming that this is what is causing the discrepancy in the stress? I now apply a body sizing control to the mesh and reduce the element size from 12.5mm to 6.25mm. I expect that the stress will increase as the element size decreases. Second run tabulated.

Calculated
1st run
2nd run
Deformation (mm)25.625.525.5
Stress (MPa)192183.1199
Strain energy, total (J)12.812.712.7
Element quality check on second run.

element quality run 2.png


All elements have perfect quality.

The stress increased as expected. But the strain energy and deformation have barely changed, the element quality is now apparently perfect.

This is a very basic example with simple geometry. I have calculated values for stress, displacement and strain energy so I can compare them with ANSYS. However, if I want to run an analysis on a more complex part where I’m a) not able to perform hand calculations, b) have what appears to be a converged deformation solution and no change in strain energy from one element size to another, c) have very high quality elements, how am I to have any confidence with the stress values ANSYS is giving me? So to restate the original question: “how can I be reasonably confident that FEA is giving me reasonably accurate stress values?

Any help and insight is greatly appreciated.
 
Engineering news on Phys.org
  • #2
Nathanwest58 said:
How can I be reasonably confident that FEA is giving me reasonably accurate stress values?
By doing exactly what you just did. A general rule of thumb for getting results that are "good enough" is to start with a coarse mesh that runs fast, then progressively reduce mesh size until the stresses stop changing significantly.

You need to give special attention to stress concentrations. One stress concentration that can create problems is the edges around a fixed surface, such as the end that's fixed when you are modelling a cantilever beam. In that case, the fixed end elements that have one surface fixed are not expected to give accurate results.

Your task, as the analyst, is to figure out how to mesh a complex part so as to get sufficiently accurate results with a model that runs in a reasonable time. This means a sufficiently fine mesh in critical areas, and a coarse mesh in low stress / noncritical areas.
 
  • Like
Likes Nathanwest58
  • #3
It’s advised to perform mesh convergence study for each analysis case - start with coarser mesh, then refine it (locally in most cases), check the results, refine again and so on. Repeat until the difference in maximum stress between subsequent analyses is sufficiently small (a table or plot can be helpful here).
However, in some cases you will run into so called stress singularity when stresses don’t stop growijg rapidly regardless of the mesh size. It’s not hard to come across this phenomenon, even in very simple analyses and there are several non-trivial ways to deal with it. Usually we add plasticity, model fillets or simply ignore the results in this particular area (if it’s not a region of interest).
 
  • Like
Likes Nathanwest58
  • #4
jrmichler said:
One stress concentration that can create problems is the edges around a fixed surface, such as the end that's fixed when you are modelling a cantilever beam. In that case, the fixed end elements that have one surface fixed are not expected to give accurate results.

Taking this into account, I reran the model again using the 6.25mm elements but I've excluded the elements closest to the fixed-end from the solution, shown in the below screenshot.

excluded.png


The maximum stress now is 189.4 MPa, pretty close to the calculated of 192 MPa. For this specific analysis, excluding these elements seems reasonable to me.

jrmichler said:
Your task, as the analyst, is to figure out how to mesh a complex part so as to get sufficiently accurate results with a model that runs in a reasonable time. This means a sufficiently fine mesh in critical areas, and a coarse mesh in low stress / noncritical areas.

FEAnalyst said:
It’s advised to perform mesh convergence study for each analysis case - start with coarser mesh, then refine it (locally in most cases), check the results, refine again and so on. Repeat until the difference in maximum stress between subsequent analyses is sufficiently small (a table or plot can be helpful here).

The 6.25mm elements everywhere in this model are definitely overkill, so as recommended I’ve done a set of runs tabulated below.

table.png


The first run has no mesh controls and let's the system do its thing. After that I’ve decreased the element size near the fixed-end, halving the size for each run and recorded the stress. This is plotted below.

stress plot.png


The horizontal red dashed line is the 192 MPa hand calculation of the stress. The two best performing element sizes were 6.25mm and 12.5mm, but anything between 7mm and 9mm will get very close. In fact, 6.25mm is a bit on the small side but not by much.

Thanks for the advice guys. Is there anything obvious that I’ve missed in this? Is this a reasonable approach to take for more complex parts where I'm not encountering a singularity, home in on regions of high stress and play with the localized element sizes until I find an inflection point in the stress curve to settle on a good element size?
 
  • Like
Likes jrmichler
  • #5
Nathanwest58 said:
Is this a reasonable approach to take for more complex parts where I'm not encountering a singularity, home in on regions of high stress and play with the localized element sizes until I find an inflection point in the stress curve to settle on a good element size?
Yes, that's what we generally do (or should do) for each case of new stress analysis. Identify regions with high stress gradients (some codes have tools that make it easier to find them) then keep refining the mesh and checking results on a plot like yours until the difference (not from analytical solution since we usually don't have it but from the previous run) is small enough. Many FEA codes have adaptive remeshing functionality but we rarely use it and prefer to refine the mesh manually.
 
  • Like
Likes Nathanwest58
  • #6
FEAnalyst said:
Many FEA codes have adaptive remeshing functionality but we rarely use it and prefer to refine the mesh manually.

Yes I’ve not had very much success using the convergence tools in ANSYS, and have been remeshing manually.

I’ve created a model of a gusseted bracket, screenshot below.

load and supports.png


I did a bunch of runs and plotted stress and deformation, below.

stress deformation plot.png


Note that the deformation here is in microns, so the changes are very small. I was more interested in the stress values I was getting. When the element size is less than 1mm the stress begins going exponential. I’m not sure that I would say that the stress has converged, but at least it appears to be bounded when the element size is between 1mm and 3.7mm. If I had to pick an element size within that bounded region I’d pick 2.3mm because the difference on either side of it is relatively small. You could argue that an element size of 3.5mm has a difference on either side of it that is even smaller than the 2.3mm element. But I’d choose 2.3mm over 3.5mm simply because it is higher resolution.

Would my selection of the 2.3mm element size be reasonable, or am I missing something?
 
  • #7
If I was analyzing that bracket, I would place fillets in all inside corners. Outside corners can be square. Then I would specify a mesh size on the inside corner fillets such that there would be three elements around the fillet (each fillet would be three elements wide). I would start with a coarse mesh in the rest of the model - three or four elements through the thickness of each leg and the gusset. Run that model, check the deformed geometry to confirm proper loading and restraints, and check the stresses for anything that looks wrong.

If everything looked good, and I wanted the best accuracy, I would reduce element size to 2/3 or 1/2 size, and run it again.

I would eliminate the chamfers/fillets on the outside corners. They force either small or sliver elements, depending on how your software meshes the model. Small elements make it run slow, sliver elements cause poor accuracy. Square outside corners are part of normal defeaturing for best running.
 
  • Like
Likes Nathanwest58
  • #8
rather than on stress I would focus on deformations
am I confident that FEM is giving me reasonably accurate deformations ?
I asked this question because when I studied engineering I was quite disppointed
It seems that the theoratical deformations do not match the real ones except for simple structures such as a beam
 
  • #9
jrmichler said:
If I was analyzing that bracket, I would place fillets in all inside corners. Outside corners can be square. Then I would specify a mesh size on the inside corner fillets such that there would be three elements around the fillet (each fillet would be three elements wide). I would start with a coarse mesh in the rest of the model - three or four elements through the thickness of each leg and the gusset. Run that model, check the deformed geometry to confirm proper loading and restraints, and check the stresses for anything that looks wrong.

If everything looked good, and I wanted the best accuracy, I would reduce element size to 2/3 or 1/2 size, and run it again.

I would eliminate the chamfers/fillets on the outside corners. They force either small or sliver elements, depending on how your software meshes the model. Small elements make it run slow, sliver elements cause poor accuracy. Square outside corners are part of normal defeaturing for best running.

Okay I did this, kept the internal fillets and got rid of the external ones. Did the first run using three elements around each fillet (0.8mm element size), and the second run with half-sized elements (0.4mm element size). Data is tabulated.

Deformation (µm)Stress (MPa)
First run 0.8mm elements51.1104.17
Second run 0.4mm elements51.2105.73

Stress from the second run.

second run.png


I don't like the shape of the elements just above the 'max' annotation, but I was seeing a very similar distribution of stress in the previous runs I did and it wasn't spreading into the region where the now badly shaped elements are.

This seems like a good way to go about analyzing parts like this, thank you again for the advice.

zoltrix said:
rather than on stress I would focus on deformations

am I confident that FEM is giving me reasonably accurate deformations ?

In this case I’m not interested in deformation. I have a set of other parts that will be subject to some high loads, so I was focused on the stress.
 
  • #10
The stress plot looks good, but it should also show the deformed geometry. Deformed geometry plots are a check on the loading and support modelling. Your stress plot appears to show that the entire support surface is fixed. This is not a good way to model this bracket because it distorts the stress results.

There is a better way to model a part that is bolted to a flat surface. Start by reviewing the design of bolted joints (search the term). One popular method is summarized in this diagram:
Bolted Joint.jpg

It simplifies the stress field for a bolt to a frustum of a cone. When modelling, take the diameter of the bottom of the cone, and fix those areas in your part.

On a small, thick, part with closely spaced bolts such as your part, it will not make a large difference in the results. On other parts, it can make a huge difference. And the results will be much more accurate.
 

1. What is confidence in FEA stress values?

Confidence in FEA stress values refers to the level of trust or certainty that can be placed on the stress values calculated using Finite Element Analysis (FEA). It is a measure of how accurate and reliable the stress values are in representing the real-world behavior of a structure or component.

2. How is confidence in FEA stress values determined?

Confidence in FEA stress values is determined by various factors such as the quality of the FEA model, the accuracy of the material properties and boundary conditions, and the expertise of the analyst. It can also be assessed by comparing FEA results with physical test data or by conducting sensitivity analyses.

3. What are the common sources of error in FEA stress values?

There are several potential sources of error in FEA stress values, including simplifications in the model, assumptions made in the analysis, and inaccuracies in material properties or loading conditions. Human error, such as incorrect input or interpretation of results, can also contribute to errors in FEA stress values.

4. How can confidence in FEA stress values be improved?

To improve confidence in FEA stress values, it is important to carefully validate the FEA model and ensure that it accurately represents the real-world structure. This can be achieved through sensitivity analyses, verification and validation processes, and comparing results with physical test data. It is also crucial to have a thorough understanding of the FEA software and its capabilities.

5. What is the importance of having confidence in FEA stress values?

Having confidence in FEA stress values is crucial for making informed engineering decisions. It ensures that the design is safe and reliable, and can help prevent costly errors or failures in the structure. Additionally, confidence in FEA stress values can also lead to cost and time savings by reducing the need for physical testing and prototyping.

Similar threads

  • Mechanical Engineering
Replies
2
Views
896
  • Mechanical Engineering
Replies
2
Views
1K
  • Mechanical Engineering
Replies
6
Views
2K
  • Engineering and Comp Sci Homework Help
Replies
3
Views
1K
Replies
5
Views
4K
Replies
7
Views
3K
  • Mechanical Engineering
Replies
21
Views
12K
  • Mechanical Engineering
Replies
3
Views
1K
  • Mechanical Engineering
Replies
1
Views
3K
Replies
11
Views
10K
Back
Top