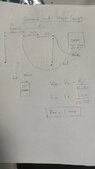
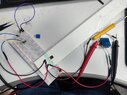
How to connect this strain gauge?

Join the discussion
Registration is free. Ask a follow-up in this thread, or start your own.
77 replies · 9K views · last reply
Micheal_Leo
Messages
103
Reaction score
4
recently i bought this strain guage where vender said it is 4bridge, i am not sure how to connect this in wheatstone bridge , i have 120 ohms resistors, and 120ohm strain gauge.
please need guide thank you.
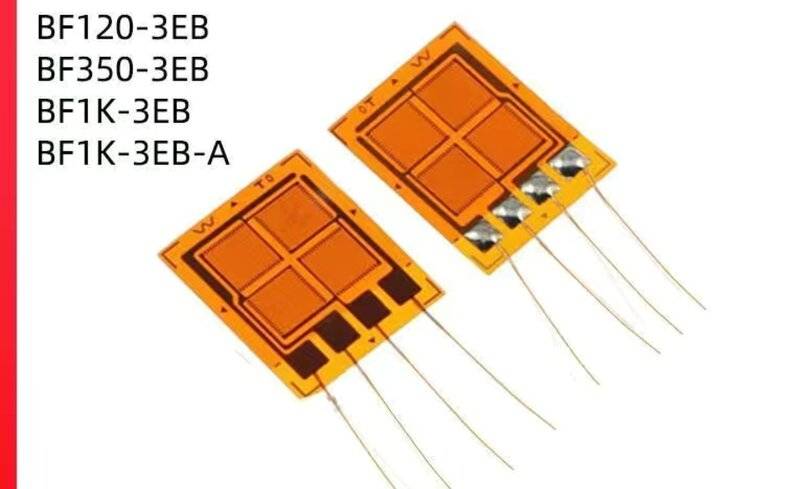
Two orange flexible strain gauge sensors with four square grid elements each, four labeled tabs and thin wires, with the model labels BF120-3EB, BF350-3EB, BF1K-3EB and BF1K-3EB-A printed on the left.
 
Last edited by a moderator:
Engineering news on Phys.org
From the look of the image, I get the impression that those four areas are actually the four resistor elements of a bridge. Put volts across two terminals and measure the volts across the other pair, which should be around Zero with the gauge undistorted and balanced. Do you have a data sheet?
 
sophiecentaur said:
From the look of the image, I get the impression that those four areas are actually the four resistor elements of a bridge. Put volts across two terminals and measure the volts across the other pair, which should be around Zero with the gauge undistorted and balanced. Do you have a data sheet?
thank you for reply, they did not have anything, from internet i found this
Photo of a flat orange flexible sensor with four solder pads, each wired: red for Power +, black for Power -, green for Signal +, and white for Signal -, with the labels printed in red above.
 
Last edited by a moderator:
Looks ok to me. Wire it up and hit it with about 5V (arbitrary) and see what happens.
 
sophiecentaur said:
Looks ok to me. Wire it up and hit it with about 5V (arbitrary) and see what happens.
i have AD620 FOR AMPLIFICATION, i connect strain guage with breadboard and arduino to get voltage output from arduino, arduino is not showing anything, please can you see the specimen principal stress direction and strain gauge orientation and selection
sophiecentaur said:
Looks ok to me. Wire it up and hit it with about 5V (arbitrary) and see what happens.
the strain gauge heat up when supply voltage but reading not coming out from arduino i think i made wrong in orientation starin guage
 
Attachments
  • Solid-model view of a rectangular plate or block drawn in SolidWorks, with thin black edges and small green and blue line-segment arrows marking directions over its surfaces.
    mmexport1692787100661.jpg
    11 KB · Views: 176
  • Close-up photo of a small brown foil strain gauge bonded to a white 3D-printed part, with four thin wire leads soldered to it and two pairs of wires with black and clear insulation hanging from the opening below.
    IMG_20230823_183349.jpg
    36.2 KB · Views: 177
The voltage to the bridge power supply terminals need only be about 1 volt.
For a healthy symmetrical bridge, the resistance between the two signal output terminals, should be the same as the resistance between the two power terminals. If that is not the case, then the bridge has been damaged.
 
  • Informative
  • Like
Likes   Reactions: Micheal_Leo and sophiecentaur
Baluncore said:
The voltage to the bridge power supply terminals need only be about 1 volt.
For a healthy symmetrical bridge, the resistance between the two signal output terminals, should be the same as the resistance between the two power terminals. If that is not the case, then the bridge has been damaged.
but AD620 AMPLIFIER NEED 3-11VOLTAGE, I have supplied 3 voltage to both( strain guage and amplifier), does my strain gauge orientation and principal stress direction same?
 
Three volts should be OK, but heating the gauge can be a problem with higher voltages.

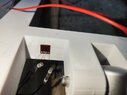
In an earlier picture, I see the strain gauge is glued onto a white structure. Maybe the connections you have used, or the orientation, is such that you get cancellation of the resistance changes due to the strain. Can you place the bridge gauge on a square of material for experimentation, until you have the electronics working?
 
Baluncore said:
Three volts should be OK, but heating the gauge can be a problem with higher voltages.

In an earlier picture, I see the strain gauge is glued onto a white structure. Maybe the connections you have used, or the orientation, is such that you get cancellation of the resistance changes due to the strain. Can you place the bridge gauge on a square of material for experimentation, until you have the electronics working?
thank you for reply, you mean i print square shape 3D and put new bridge on it?
 
Micheal_Leo said:
, you mean i print square shape 3D and put new bridge on it?
No printing required.
Just stick a bridge onto a scrap piece of flat material, something you can bend with your hand while you experiment with the electronics.
 
Baluncore said:
No printing required.
Just stick a bridge onto a scrap piece of flat material, something you can bend with your hand while you experiment with the electronics.
yes i can do that
 
Micheal_Leo said:
the strain gauge heat up when supply voltage but reading not coming out from arduino
I guess this could be a generational thing but did you consider using an independent supply and measuring the emerging volts with a DMM? An Arduino may be smart but you can't beat taking measurements in isolation if you don't know how the strain device will behave.
 
You might want to take another? look at the AD620 datasheet.
 
Dullard said:
You might want to take another? look at the AD620 datasheet.
Micheal_Leo said:
... but AD620 AMPLIFIER NEED 3-11VOLTAGE, I have supplied 3 voltage to both( strain guage and amplifier), ...
The AD620 requires a minimum of ±2.3 V, that is 4.6 volts total. Depending on the circuit's range of output voltage, you will need more than a 5 volt supply. That will be too high for stable operation of the strain gauge.
 
Baluncore said:
The AD620 requires a minimum of ±2.3 V, that is 4.6 volts total. Depending on the circuit's range of output voltage, you will need more than a 5 volt supply. That will be too high for stable operation of the strain gauge.
Hence my question about using a DMM as a starter, to see what the gauge actually does. There must be a few mV to measure.
 
Baluncore said:
No printing required.
Just stick a bridge onto a scrap piece of flat material, something you can bend with your hand while you experiment with the electronics.
vide DC
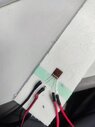
unfortunately i can not give 1v to bridge , my adapter can not set on 1 v , please guide thank you
 
Attachments
  • Small brown foil strain gauge with three solder pads, bonded to a white strip with a mint-green tape band, with black and red wires soldered to its pads and to the strip.
    Weixin Image_20230825033625.jpg
    22.5 KB · Views: 167
Micheal_Leo said:
unfortunately i can not give 1v to bridge , my adapter can not set on 1 v ,
Do you have a soldering iron, by any chance - or perhaps you do your connections on a bread board? Make yourself a potential divider and 'manufacture' 1V that way from the same power supply that you are using for other things.

Edit: and do you have a DMM?
 
Baluncore said:
No printing required.
Just stick a bridge onto a scrap piece of flat material, something you can bend with your hand while you experiment with the electronics.
vide DC
unfortunately i can not give 1v to bridge , my adapter can not set on 1 v , please guide thank you
sophiecentaur said:
Do you have a soldering iron, by any chance - or perhaps you do your connections on a bread board? Make yourself a potential divider and 'manufacture' 1V that way from the same power supply that you are using for other things.

Edit: and do you have a DMM?
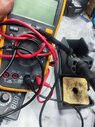
yes i have these

how can i establish potential divider for 1V , thank you
 
Attachments
  • Photo of a yellow and black handheld digital multimeter with red and black test leads plugged into its input jacks, next to a soldering iron in a black stand with a damp brown sponge.
    PhF.jpg
    47.1 KB · Views: 150
Micheal_Leo said:
how can i establish potential divider for 1V , thank you
You must know know the basics of a potential divider? This link will remind you about the basic potential divider idea. But, for a load of resistance as low as the 120Ω bridge, it may be better use either a low voltage regulator (off the shelf) to give you 1V from your amplifier power supply.
This is very basic circuit stuff and you really should try to learn about it for your future use. It's not really appropriate for me to design your circuits for you. There must be loads of information about interfacing the Arduino with simple devices - even your strain gauge bridge.
 
sophiecentaur said:
You must know know the basics of a potential divider? This link will remind you about the basic potential divider idea. But, for a load of resistance as low as the 120Ω bridge, it may be better use either a low voltage regulator (off the shelf) to give you 1V from your amplifier power supply.
This is very basic circuit stuff and you really should try to learn about it for your future use. It's not really appropriate for me to design your circuits for you. There must be loads of information about interfacing the Arduino with simple devices - even your strain gauge bridge.
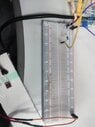
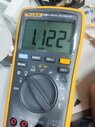
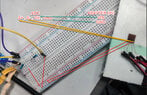
have tried to manage 1V using 2(1.5k) and 10k , i am thinking like this not sure i am right or wrong , appreciate your valuable time and guidance

the out from voltage divider circuit will go to breadboard down relay, and the strain guage + and - will connect to this relay
 
Attachments
  • Photo of a breadboard with a few resistors and jumper wires connected near its top right, a wired ribbon cable and a red and black power lead at the bottom, next to a flexible strain gauge sensor on a white surface.
    Weixin Image_20230825060211.jpg
    41.1 KB · Views: 143
  • Fluke 17B+ digital multimeter on Auto DC voltage setting, display reading 1.122 V DC, with the rotary dial set to the VΩ and mV range area and a breadboard in the background.
    Weixin Image_20230825060158.jpg
    42.3 KB · Views: 174
  • Photo of a breadboard wired to a strain gauge setup, with red labels for ADC S+, S-, Vin, GND and ADAPTER (8V) VIN and GND, and red and yellow wire annotations.
    2023-08-25_06-07-19.jpg
    68.8 KB · Views: 168
Last edited:
Micheal_Leo said:
have tried to manage 1V using 2(1.5k) and 10k , i
Are you using the diagram in the link I quoted? Which is R2 and R1 and what is your supply voltage? Show your working how you calculated 1V out? Your output volts can be obtained by many different values for R2 but consider what happens when you connect the bridge across the output of the potential divider, the resistance ratio changes a lot (current will flow through the bridge). The bridge presents 120Ω and you need to consider this because it appears in parallel with R2 so you need a different R1. Google with "using potential divider to change supply volts" and you'll find loads of discussions which show you what I mean. If you have a box of resistors then your bread board will make this easy to experiment with.
A 1V voltage regulator may be better because the output volts do not depend on the value of the bridge resistance.

PS. I just found your earlier thread on the same topic. It may be just too hard for you and maybe you should try a simpler project first, to get familiar with the basics of electronic circuits. It's all good stuff though and you can progress to this project eventually but not if you are trying to sort out everything at once.
 
sophiecentaur said:
Are you using the diagram in the link I quoted? Which is R2 and R1 and what is your supply voltage? Show your working how you calculated 1V out? Your output volts can be obtained by many different values for R2 but consider what happens when you connect the bridge across the output of the potential divider, the resistance ratio changes a lot (current will flow through the bridge). The bridge presents 120Ω and you need to consider this because it appears in parallel with R2 so you need a different R1. Google with "using potential divider to change supply volts" and you'll find loads of discussions which show you what I mean. If you have a box of resistors then your bread board will make this easy to experiment with.
A 1V voltage regulator may be better because the output volts do not depend on the value of the bridge resistance.

PS. I just found your earlier thread on the same topic. It may be just too hard for you and maybe you should try a simpler project first, to get familiar with the basics of electronic circuits. It's all good stuff though and you can progress to this project eventually but not if you are trying to sort out everything at once.
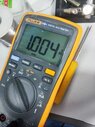
the other possibility to have 1 V as shown by calculation and DMM
 
Attachments
  • Fluke 179 digital multimeter on the DC volts range, display reading 1.004 V DC.
    DMM.jpg
    43.6 KB · Views: 162
  • Handwritten circuit schematic titled Resistors and Strain Gauge, showing R1 = 10000 Ω, a 2 kΩ and 500 Ω resistor in series as R2, a DMM, a 5V adapter with red and black leads, and the voltage divider equation Vout = Vin × R2/(R1+R2) = 5 × 2510/12510 = 1.00 V.
    VD.jpg
    16.2 KB · Views: 172
sophiecentaur said:
Are you using the diagram in the link I quoted? Which is R2 and R1 and what is your supply voltage? Show your working how you calculated 1V out? Your output volts can be obtained by many different values for R2 but consider what happens when you connect the bridge across the output of the potential divider, the resistance ratio changes a lot (current will flow through the bridge). The bridge presents 120Ω and you need to consider this because it appears in parallel with R2 so you need a different R1. Google with "using potential divider to change supply volts" and you'll find loads of discussions which show you what I mean. If you have a box of resistors then your bread board will make this easy to experiment with.
A 1V voltage regulator may be better because the output volts do not depend on the value of the bridge resistance.

PS. I just found your earlier thread on the same topic. It may be just too hard for you and maybe you should try a simpler project first, to get familiar with the basics of electronic circuits. It's all good stuff though and you can progress to this project eventually but not if you are trying to sort out everything at once.
I have tried to get reading from wheatstone bridge , the beam not bend just in stationar position , although the reading from DMM not stable ,

Voltage output from wheatstone bridge
Voltage reading from AD620 output
 
Micheal_Leo said:
the other possibility to have 1 V as shown by calculation and DMM
That 1.04V looks ok. It will change when you hang the bridge on the output? That's because you have changed the effective value of R2. Starting with that 120Ω, what R1 value is needed to get 1V? Insert new resistor and check that you get 1V.
Connect DMM across the other two terminals of the bridge. You should get low value (zero if perfectly balanced). Flex the bridge and see change in DMM volts
 
sophiecentaur said:
That 1.04V looks ok. It will change when you hang the bridge on the output? That's because you have changed the effective value of R2. Starting with that 120Ω, what R1 value is needed to get 1V? Insert new resistor and check that you get 1V.
Connect DMM across the other two terminals of the bridge. You should get low value (zero if perfectly balanced). Flex the bridge and see change in DMM volts
several things i confirmed .
1) the voltage is receiving by bridge is 1V
2) the output from wheatstone bridge(DMM) is fluctuating a lot , never stable going to very high value and drop sudden.
3) the voltge in DMM is between 0.004-0.006 , mv fluctuates a lot
 
Attachments
  • Photo of a breadboard circuit on a white bench with a small strain gauge, blue and yellow jumper wires, a blue sensor module and red and black multimeter probes connected to the output.
    mn.jpg
    61.8 KB · Views: 174
Last edited:
Micheal_Leo said:
1) the voltage is receiving by bridge is 1V
Have you modified your potential divider resistors? If not then there is something wrong with your connections. The ratio of the 'pot' would be 120/10120.
Have you used your DMM to find the resistances between (all) the bridge terminal pairs? What do you get?
 
sophiecentaur said:
Have you modified your potential divider resistors? If not then there is something wrong with your connections. The ratio of the 'pot' would be 120/10120.
Have you used your DMM to find the resistances between (all) the bridge terminal pairs? What do you get?
i am very much confused that previous i made voltage divider of 1V using fixed resistors( 10000 and 2k+510) and attach bridge to it, should i make voltage divider using pot (10k) and 120 resistor?

Edit: today the vender told me that
"Generally, the working current during static measurement is about 250mA. During dynamic measurement, the allowable working current can reach 75-100mA, while the allowable working current of the foil strain gauge can be greater."
so i want to go for 250mA
 
Last edited:
Micheal_Leo said:
Edit: today the vender told me that
"Generally, the working current during static measurement is about 250mA. During dynamic measurement, the allowable working current can reach 75-100mA, while the allowable working current of the foil strain gauge can be greater."
so i want to go for 250mA
I would expect the bridge current to average between 5 mA and 20 mA.

If you put 250 mA through the bridge, it should not be for more than half a second in ten seconds.
 
Baluncore said:
I would expect the bridge current to average between 5 mA and 20 mA.

If you put 250 mA through the bridge, it should not be for more than half a second in ten seconds.
yes i believe 250mA is still high , i will go for 5-20mA first
 
Baluncore said:
I would expect the bridge current to average between 5 mA and 20 mA.

If you put 250 mA through the bridge, it should not be for more than half a second in ten seconds.
i just again confirm from vender , confirmation is 25mA