Discussion Overview
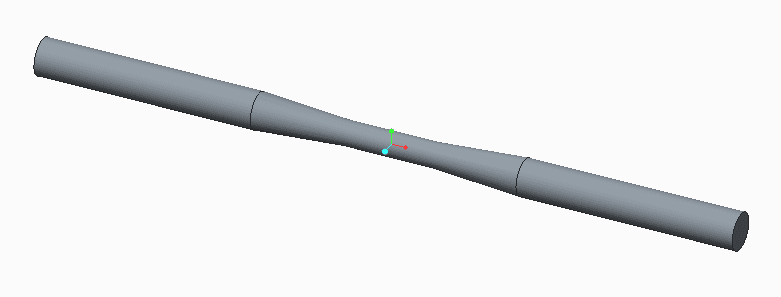
The discussion revolves around methods for measuring the diameter of a curved part proposed for manufacturing. Participants explore various physical and optical measurement techniques, considering the challenges posed by the curvature of the part.
Discussion Character
- Technical explanation
- Debate/contested
- Experimental/applied
Main Points Raised
- One participant notes that traditional vernier calipers are inadequate for measuring curved surfaces and inquires about alternative methods.
- Another suggests using a granite surface plate with a digital height stand or a Coordinate Measurement Machine (CMM) for accurate measurements.
- A point micrometer is proposed as a potential solution for measuring the diameter at the midpoint of the part.
- Building a jig to position the part under a Dial Indicator is also mentioned as a viable approach.
- Concerns are raised about the practicality of using a micrometer due to potential cumbersome handling.
- A participant questions the necessity of a CMM, suggesting that an optical profilometer could suffice for measuring roughness and diameter.
- Discussion includes the feasibility of using laser distance sensors for accurate measurements along the edge of the part, with considerations of cost-effectiveness based on production volume.
- One participant shares their experience with CMMs and optical profilometers, asking for specific dimensions and accuracy requirements needed for the measurement.
- Another participant describes the part as a round bar with a reduced diameter and suggests the creation of a Go/NoGo profile template for measurement.
- A later reply details a successful measurement using a profilometer, emphasizing the use of a V block and computer-controlled table for precise positioning.
Areas of Agreement / Disagreement
Participants express a range of opinions on the best measurement techniques, with no consensus reached on a single method. Some advocate for traditional methods like CMMs, while others propose optical solutions or simpler mechanical setups.
Contextual Notes
Participants mention various assumptions regarding the production volume and accuracy requirements, which may influence the choice of measurement method. The discussion reflects uncertainty about the optimal approach given the part's specific geometry.
Who May Find This Useful
Manufacturers, engineers, and quality control professionals interested in measurement techniques for curved parts may find this discussion relevant.
 I know there is some photographic method of measuring distances, however I would like to know is there no way of physically measuring the diameter along the curvature.
