Our Beautiful Universe - Photos and Videos
Click For Summary
Discussion Overview
This thread is dedicated to sharing and appreciating videos, photos, and animations of space and celestial objects, emphasizing the beauty of the Universe. Participants are encouraged to include scientific information alongside their contributions, while adhering to forum guidelines regarding mainstream science.
Discussion Character
- Exploratory
- Conceptual clarification
- Debate/contested
Main Points Raised
- One participant initiates the thread by inviting others to share clips and photos of space, highlighting the beauty of the Universe.
- Several participants share specific video clips, including time-lapse footage from the ISS and NASA's Solar Dynamics Observatory.
- Another participant mentions the upcoming capture of the Dawn spacecraft by Ceres, expressing excitement about future images from the New Horizons mission to Pluto.
- One participant recalls a clip titled "The Known Universe" and reflects on its emotional impact while viewing the Milky Way.
- Another shares a video about NASA astronaut Don Pettit experimenting with water in a weightless environment, noting its relevance to the thread's theme.
- Some participants discuss the Digital Universe software, expressing mixed feelings about its representation of the solar system and the Milky Way.
- A participant creatively describes the dynamics of Earth's atmosphere, drawing parallels to celestial phenomena and inviting further exploration of the topic.
Areas of Agreement / Disagreement
The discussion features a variety of contributions and perspectives, with no clear consensus on specific interpretations or representations of the shared content. Participants express personal reflections and emotional responses to the videos and images, indicating a shared appreciation for the beauty of the Universe while maintaining individual viewpoints.
Contextual Notes
Some posts reference specific scientific missions and software, but the discussion remains open-ended regarding the implications and interpretations of the shared materials.

- 2,192
- 10,261
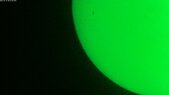
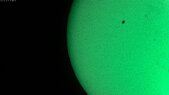
Yes, horizontally it was pretty low. But I couldn't resist it.bruha said:(I plan moon images too but unfortunately getting quite low horizont already after sunset...)

- 1,076
- 765
5 Stacked Shots x 5 minutes (25 minutes) @ 600mm focal f/9 6400iso (cropped) - RGB thru 6nm Hydrogen Alpha Filter converted to monochrome - Moonlit Bortle 6
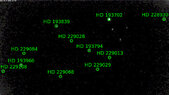
| Center (RA, Dec): | (274.592, -13.919) |
| Center (RA, hms): | 18h 18m 22.134s |
| Center (Dec, dms): | -13° 55' 07.635" |
| Size: | 2.07 x 1.38 deg |
| Radius: | 1.246 deg |
- 2,192
- 10,261
How To See A Black Hole
- A documentary about the Event Horizon Telescope project team which gave us the first image of a black hole. It was very fascinating to see the incredible planning that had to be done to synchronize all the telescopes all over the world, including waiting for good weather.
The Warped Side of the Universe: Kip Thorne at Cardiff University
Professor Kip Thorne is a theoretical physicist and Nobel laureate. In this talk he discusses "My Romance with the Warped Side of the Universe: from Black Holes and Wormholes to Time Travel and Gravitational Waves".
- 2,192
- 10,261
"Accomplished astrophotographer Bartosz Wojczyński has created a gigantic 2.2 gigapixel photo of the Milky Way that he was able to capture in just one night, which is an astounding achievement given that a similar 1.7 gigapixel photo took another photographer 12 years to complete. "
The article also contains photos of the two telescopes used dually.
Article: Massive 2.2 Gigapixel Photo of the Milky Way Was Taken in Just 4.5 Hours (PetaPixel)
A zoomable version of the photo is here.
- 2,192
- 10,261
Amazing photos! When I saw the second photo I immediately recognized the castle since I've been there.berkeman said:
It's Château de Chambord which is a beautiful, majestic castle.
Regarding photographing the Milky Way I have not yet tried doing this myself due to city/region light pollution. But I have planned to take a short trip this summer or autumn to a quite nearby place (a beach by the ocean) which is classed as Bortle 2 (typical truly dark site), so hopefully I will get some nice shots then. And maybe I'll try to do a timelapse. We'll see.
- 2,374
- 5,190
- 2,192
- 10,261
@davenn , @Andy Resnick , @collinsmark , @bruha, @chemisttree , @Drakkith , @Devin-M and others doing observations/astrophotography:
I don't think I've shared this link here for some reason.
It's an interactive worldwide map showing light pollution which can help to locate nearby good spots for nighttime observation/astrophotography.
Light Pollution Map: http://www.lightpollutionmap.info
Some of you may already know about the map, but I wanted to share it, since I recently used the map to locate a Bortle 3 site (quite nearby) and also a Bortle 2 site (on the small Danish island Bornholm, which is pretty close to me, and available via ferry from Sweden).
Edit: The map is scrollable, zoomable and clickable. If you click with the left mouse button on a location you get coordinates, altitude, brightness info and Bortle class.
- 9,729
- 11,867
DennisN said:I don't think I've shared this link here for some reason.
It's an interactive worldwide map showing light pollution which can help to locate nearby good spots for nighttime observation/astrophotography.
hey mate,
I have used another one for a number of years
http://darksitefinder.com/maps/world.html#4/-18.52/-211.90
it looks very similar in it's layout, but the huge advantage is that it continuously scrolls and doesn't stop at the dateline just
east of NZ


- 394
- 526
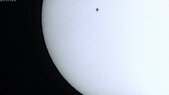
Deneb, Jupiter,higher exp. Jupiter with some moons and Saturn .I was trying as well Nort America nebula near Deneb but no succes (although Deneb was quite bright and I think this Nebula with 4 ap. magnitude should be imaginable...)


Attachments


- 394
- 526
last days I was trying first JUp/Sat. images with new scope (Newton 1000 x 200 mm) and SV Ebony eyepiece Camera while I use: BF-blue filter SV Ebony UHC, Y, Y2-light-dark yellow filter, event. without+JUp. overexp. with moons.
Lot of succes
Attachments
-
 Capture_00001.jpg3 KB · Views: 133
 -
 Capture_00023 Y2.jpg3.3 KB · Views: 145
 -
 Capture_00028 BF.jpg3 KB · Views: 147
 -
 Capture_00011 moons.jpg3.3 KB · Views: 161
 -
 Capture_00016 bez B.jpg3.2 KB · Views: 143
 -
 Capture_00016 bez.jpg3.2 KB · Views: 146
 -
 Capture_00050 Y.jpg3.3 KB · Views: 142
 -
 Capture_00084 BF.jpg3.1 KB · Views: 126
 -
 Capture_00084 BF2.jpg2 KB · Views: 156
 -
 Capture_00118 Y2.jpg3.9 KB · Views: 138
- 2,192
- 10,261
First Video of NASA’s Ingenuity Mars Helicopter in Flight, Includes Takeoff and Landing (NASA JPL)
In this video captured by NASA’s Perseverance rover, the agency's Ingenuity Mars Helicopter took the first powered, controlled flight on another planet on April 19, 2021.
NASA’s Perseverance Rover Hears Ingenuity Mars Helicopter in Flight (NASA JPL)
On April 30, 2021, NASA’s Perseverance rover made history as the first spacecraft to record sounds from another spacecraft on another planet. During Ingenuity’s fourth flight, a microphone included with the SuperCam instrument aboard Perseverance captured the humming sound of the blades and the din of wind.
- 752
- 1,507
- 394
- 526
- 3,954
- 777
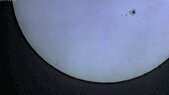
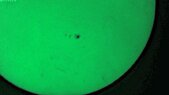
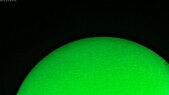
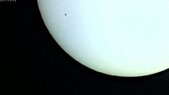
Yeah but with the right filter...Keith_McClary said:
- 7,794
- 4,097
Nikon D810 + 400/2.8 lens, about 2 hrs @ ISO 64.
- 394
- 526
 .-somewhere near Sadir.. ha ha
 Attachments

- 1,076
- 765
- 394
- 526
- 1,076
- 765
- 1,076
- 765
https://www.speakev.com/attachments/bb7abeb1-f8a3-4ad0-975f-2109406abff3-jpeg.147788/
Similar threads
- · Replies 30 ·
- Replies
- 30
- Views
- 5K
- · Replies 7 ·
- Replies
- 7
- Views
- 4K
- · Replies 76 ·
- Replies
- 76
- Views
- 11K
- · Replies 22 ·
- Replies
- 22
- Views
- 4K
- · Replies 91 ·
- Replies
- 91
- Views
- 23K
- · Replies 90 ·
- Replies
- 90
- Views
- 14K
- · Replies 1 ·
- Replies
- 1
- Views
- 4K
- · Replies 1 ·
- Replies
- 1
- Views
- 6K
- Replies
- 1
- Views
- 3K
- · Replies 3 ·
- Replies
- 3
- Views
- 3K