Getting Started with Solar System Imaging
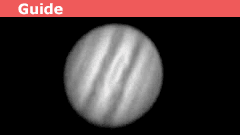
Some of the most visible objects in the sky are objects within our own solar system: including the Sun, moon, and planets. These objects are generally much brighter than most deep-sky objects and in the case of planets, appear much smaller in the sky. These factors have lead amateur astronomers to create specialized imaging methods to capture solar system objects in extraordinary detail.
Table of Contents
Background:
When imaging solar system objects, the goal is to get clear and detailed an image as possible. This is somewhat different from deep-sky imaging where the goal is to get as much light as possible. Unlike deep sky objects (DSOs) which can be extremely dim, solar system objects (SSOs) tend to be very bright. This means that the exposure time required to capture an image of an SSO is drastically shorter than the time required to get an image of a nebula or galaxy. This fact allows us to focus our efforts on increasing the resolution of our images rather than their brightness.
There are two factors that limit the resolution of our images: the diffraction limit of the telescope and the atmosphere. The latter being the worse of the two. Water vapor, dust, light pollution, and atmospheric turbulence will all conspire to blur and wash out the image. The only way to avoid light pollution is of course to go to a dark location. The other effects such as water vapor in the air (called “transparency”) and atmospheric turbulence (called “seeing”) vary from night to night with some locations tending to be better on average than others. Transparency is usually good in cool-dry locations and seeing tends to be good in warm-humid locations.
When imaging SSOs, it is important to choose times at which the seeing is above average. A good resource for checking seeing conditions as well as cloud cover is http://www.cleardarksky.com/. Choosing times of good seeing can mean the difference between your planetary images looking like blurry spheres and looking like they were taken with a space-based telescope. I’m not kidding here! I have seen some truly spectacular images taken during nights of exceptional seeing. You can check some of them out at https://www.astrobin.com/.
When to Image:
Some times are better than others for capturing images of SSOs. The planets go through phases like the moon and you will want to image them when they are fully illuminated. This occurs in opposition to Mars and the outer planets and near conjunction with the inner planets. The phases of the gas giants are less noticeable but you still can only image them when they are on the same side of the Sun as the Earth. The dates of these events can be found in amateur astronomy magazines or online from both time-keeping organizations and astronomy websites.
The Moon is best photographed during the waxing or waning phases. This is because the rugged terrain will cast distinct shadows across the surface, giving a more three-dimensional look. This effect is greatest near the terminator (the division between the light and dark side of the moon).
The Sun can be imaged any time that it is clear during the day. However, the Sun is a very dynamic object and the most interesting solar images are taken when the Sun is most active. The Sun’s activity goes through 11-year cycles called solar cycles. At the peak of these cycles, there are usually a lot of sunspots and solar flares to give your images a more dynamic look.
Choosing a Telescope:
Although a telescope is not required for solar system imaging, (you can just use a telephoto lens for your DSLR camera) a good telescope will show a dramatic improvement in resolution over a camera lens. This is mainly due to the diffraction limit of the objective. The diffraction limit defined using the first node of the Airy disk is
$$\theta=\frac{1.22\lambda}{d}$$
where ##\theta## is the angular resolution, ##\lambda## is the wavelength, and ##d## is the aperture diameter. So if for example you use a telephoto lens with a diameter of ##d=58\text{mm}## and green light is passing through the lens ##\lambda=500\text{nm}## the diffraction limit is
$$\theta=\frac{(1.22)(500\times 10^{-6}\text{mm})}{58\text{mm}}=1.1\times 10^{-5}=2.2\;\text{arcseconds}$$
This number is acceptable for solar imaging where individual sunspots can be many arcseconds wide but it is less appropriate for planetary imaging. The planet Saturn for example fluctuates in apparent size from about 15 to 21 arcseconds. With an angular resolution of 2.2 arcseconds, we cannot resolve features any smaller than about 1/10 the size of the planet. This would make it difficult to resolve prominent features such as the Cassini gap.
Looking at the other extreme, let’s assume you are using a large ##355\text{mm}## reflector telescope. The diffraction limit is now
$$\theta=\frac{(1.22)(500\times 10^{-6}\text{mm})}{355\text{mm}}=1.7\times 10^{-6}=0.35\;\text{arcseconds}$$
This is about a six-fold increase in resolving power over the telephoto lens. Note that these numbers are only an order of magnitude estimate and should be viewed as an approximate prediction as to what one will experience with different imaging systems. There are other factors that can make a system perform worse than this estimate would imply. The atmosphere is a big factor. Also, telephoto lenses are often nowhere near being diffraction limited due to their large number of lens groups, so our figure of 2.2 arcseconds is likely much larger. Thus if your goal is to get really sharp images of SSOs, a telephoto lens will not be adequate and a telescope, preferably one with a large aperture, is more appropriate.
Focal Length and Pixel Size:
The focal length of your telescope and the pixel size of your camera will set a hard limit on the resolving power of your imaging system. The camera cannot distinguish features that fall on the same pixel; so the smallest features that can be resolved must be larger than the angular resolution of one pixel. If ##W## is the width of a pixel in ##\mu\text{m}## and ##L## is the focal length in ##\text{mm}##, then the angular resolution per pixel in arcseconds is about
$$\theta=\frac{206.2W}{L}$$
This equation will set the maximum pixel size of a camera or focal length of a telescope given a certain aperture. Using the example of the ##355\text{mm}## telescope from above, the resolution per pixel should not be larger than ##\theta=0.35\;\text{arcseconds}##. Let’s assume the pixel width of your camera’s imaging chip is ##W=3.75\mu\text{m}##, this is the pixel size of the ASI120 camera which is commonly used for planetary imaging. The focal length of our telescope should be no shorter than
$$L=\frac{206.2 W}{\theta}=\frac{(206.2\text{mm}/\mu\text{m}) (3.75\mu\text{m})}{(0.35\;\text{arcseconds})}\approx 2210\text{mm}$$
A Schmidt-Cassegrain telescope with an aperture diameter of a ##355\text{mm}## usually has a focal length of just under ##4\text{m}##, so this imaging setup can be considered diffraction limited. If you are imaging with a camera that has larger pixels, however, such as the Nikon Df which has a pixel width of ##W=7.3\mu\text{m}##, then the required focal length would be
$$L=\frac{(206.2\text{mm}/\mu\text{m}) (7.3\mu\text{m})}{(0.35\;\text{arcseconds})}\approx 4300\text{mm}$$
The focal length of most ##355\text{mm}## Schmidt-Cassegrain telescopes will be below this, so we need to increase the effective focal length. A common way to do this is to use a Barlow lens. Barlows are labeled with a multiplier which signifies the factor by which the focal length will be increased. For this example, we could use a x1.5 Barlow which would increase the focal length from just under ##4\text{m}## to almost ##6\text{m}##. This would push us over the lower limit of ##4300\text{mm}## for diffraction-limited imaging.
One final point here is that it is almost always better to use a focal length that is longer than you need. Image processing software can sometimes pull out some extra detail if several pixels are sampling at the diffraction limit rather than one. A general rule of thumb for most solar system imaging is to use a focal ratio (focal length/aperture diameter) of between f/15 and f/25 although this can be less if you are trying to image the full disk of the Sun or Moon.
Filters:
If you are imaging the Sun, solar filters are absolutely necessary. You should never point an unfiltered telescope at the Sun as this may cause instant blindness and damage to the telescope. Always point your telescope away from the Sun when removing covers and attaching filters and always check that the filter is securely in place before looking through the telescope.
There are two categories of solar filters: energy rejection filters and narrowband filters. Energy rejection filters (also called white-light filters) are always needed in some form. They are simply very dark neutral density filters that bring down the intensity of the light to safe levels. These filters can reveal sunspots and are usually fairly inexpensive. Narrowband filters can also be used along with a high-quality energy rejection filter to show fine details on the Sun. Narrowband filters come in two flavors: Ha and Ca-k. A Ha filter only passes light around 656nm which is from the ##n=3## to the ##n=2## transition in Hydrogen. These filters are useful for imaging solar flares and sunspots in high detail. A Ca-k filter only passes light around 393nm which is emitted by singly ionized Calcium (Ca II). These filters are useful for revealing granulation on the solar surface.
Neutral density filters are helpful when imaging the moon with a sensitive camera or a large aperture telescope. The moon is the second brightest object in the sky and can overwhelm your camera’s imaging sensor, effectively washing out fine details in the image. Using a neutral density filter will cut down on the light reaching the camera and may help in getting exposures with optimal detail.
Colored planetary filters are used to pull out a bit of extra contrast when imaging the moon or planets. Using color filters is not required and some amateur astronomers question whether they are useful at all. Some common filters are #8 (yellow), #21 (orange), and #80A (blue). The manufacturer will often provide a table in their catalog indicating which filter works best for a given target. The decision of whether or not to use planetary filters is left for the reader to decide as this is really a matter of personal preference.
Choosing a Camera:
Almost any digital camera with the ability to take many successive short exposures will work for solar system imaging. Some people even use webcams attached to the eyestalk of the telescope; yielding quite respectable results. If you are looking to get a specialized camera for solar system imaging, then you will probably want one with very small pixels. This will help to make sure that you are adequately sampling the limits of the telescope’s resolving power. If you are using filters while imaging, it is best to use a monochrome camera. This is simply because the filters will only pass light at specific wavelengths, meaning that only one set of color pixels will be active. Using a monochrome camera can also give the astronomer a lot of control over the final coloration of the image. If you are imaging the Sun, for example, you may want the color of the solar flares to be different than the color of the surface. This is achieved using the software during the final stage of image processing.
“Lucky” Imaging:
Lucky imaging is the name of a technique for overcoming the normal seeing limits of the atmosphere when imaging SSOs. Atmospheric turbulence will cause the image to shake and distort and is often likened to looking through rippling water. There will be brief moments however where the atmosphere is relatively calm and an image taken during this time will be exceptionally well resolved. Since SSOs are generally very bright, the time needed to expose an image is very short and hence, we can take a lot of them. If we take a large number of images, some of them may have been taken during these brief moments of near-perfect seeing.
The goal is then to capture a large number (at least a few hundred) of short exposure images and feed these into software (RegiStax is very popular) which will pick out the best ones and discard the rest. The best exposures are then stacked together, producing an image that is exceptionally well resolved. This method is really the “big secret” to solar system imaging and is how some amateur astronomers have been able to produce near textbook quality images of SSOs.
Bringing it all Together:
To summarize the points above, if your goal is to put together the best SSO imaging system that you can, you will want a large aperture telescope, a decent digital camera (preferably a monochrome camera with a small pixel size), the necessary filters, and lucky imaging software. Each of these parts needs to work together in your setup. This means considering things like the back focus of your telescope, the weight of the camera, stability of the mount, etc. Newtonian telescopes for example have notoriously little back focus and this may prevent you from being able to achieve prime focus with your camera.
Even without an ideal setup, obtaining great images is still very much in reach. As with any hobby, the goal should always be to learn and improve rather than getting everything perfect from the start. With time and patience, you can adjust both your equipment and techniques until you start putting out Astro-images that will make the rest of the community jealous!
Education: Graduate student in physics; specializing in biophysics and non-linear dynamics.
Hobbies: Astrophotography, Electronics, and Mineral collecting

I think it's interesting how time of day/night and date all factor in when the optimal time to photograph something in the sky. I wouldn't have thought to factor it.
Great first Insight @NFuller!
overall good :smile:
well done
just a couple of comments
When to Image:
Some times are better than others for capturing images of SSOs. The planets go through phases like the moon and you will want to image them when they are fully illuminated. This occurs at opposition for Mars and the outer planets and near conjunction for the inner planets.
Reference https://www.physicsforums.com/insights/getting-started-solar-system-imaging/You could make your above statement a little clearer.
The outer planets don't go through significant phases like the inner planets and the moon do
A changing from gibbous to full phase can reasonably easily be detected for Mars but for Jupiter and beyond
most observers wouldn't see any change
The Sun’s activity goes through 10 year cycles called solar cycles.
Reference https://www.physicsforums.com/insights/getting-started-solar-system-imaging/the small solar cycle is 11 years :smile:
(the full one is 22 years)
Dave
Thanks davenn for pointing this out! I will fix and clarify these points.