Astrophotography Guide: Beginner to Advanced Tips & Gear
- Part 1: Introduction to Astrophotography
- Part 2: Intermediate Astrophotography
- Part 3: Advanced Astrophotography
Table of Contents
Series & prerequisites
For this Insight series (three total), I assume you either have a camera (with an attached lens) or already know how to attach your camera to your telescope. If you have a telescope and want to buy a camera, see the “camera buyer’s guide” insight. If you have a camera and want to buy a telescope, see the “telescope buyer’s guide” insight. As always, many PF members with considerable expertise are happy to provide advice and help.
Introduction
What is astrophotography?
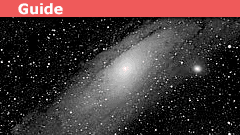
Astrophotography is an imaging method that primarily relies on long exposures. How long? As long as possible. The ability to create long exposures has been greatly simplified by modern digital image-processing methods, especially image stacking.
Why modern sensors matter
Modern photographic sensors now outperform film. Smartphone cameras now perform as well as 6-year-old DSLRs, placing high-performance imaging tools in the hands of nearly everyone. Combined with advanced post-processing methods, modern sensors make imaging deep-sky objects—normally invisible to the naked eye—routine. In short, current imaging technology makes it easy for anyone to explore what happens when the camera is pointed up instead of down.
Key differences from daytime photography
How it’s similar and different
Astrophotography is like daytime photography in one important way: the most important piece of equipment is you. (Almost) any camera you have on hand can acquire images of night-sky objects. Your results primarily depend on your willingness to spend time and effort improving. The universe is yours to discover!
There are, however, important differences:
- Night-sky objects are highly stable and spectrally well characterized, so objective metrics exist to compare your image with “reality.”
- Astrophotography often images point sources of light, so your image is effectively the point spread function writ large—every flaw in equipment or technique is visible.
- Post-processing is as important as correct exposure: you must master both imaging and processing skills.
- Every photon is precious. Optimal results generally require fast lenses (faster than f/4) to collect more light.
Who this Insight serves
Who should read this
This Insight is structured into three parts: the first is aimed at the rank beginner, the second at the more experienced photographer, and the last at those interested in deep-sky astrophotography and astrometry.
One final tip: because image stacking lets you combine images taken on different nights (or years), it helps to keep a log of your optimal camera settings. A consistent log will save time as you iterate and improve.
Astrophotography for Beginners
What you can photograph with basic gear
“All I have is my smartphone or basic point-and-shoot camera.”
Good news — that’s all you need to get started. Bad news — with basic equipment you are mostly limited to photographing the Moon, the visible planets (Venus, Mars, Jupiter, Saturn), and the Sun (only with proper solar filtering).
Don’t try to photograph the Sun
Without a proper solar filter, photographing the Sun is dangerous for both equipment and eyesight. Do not attempt solar imaging unless you have a certified solar filter attached securely to your lens or telescope.
Practical tips for phones and basic cameras
Focusing and exposure can be difficult at high zoom: small movements become large image shifts and optical throughput drops, increasing noise. If your camera allows focusing and exposure lock on a small subregion, use it and center that region on the Moon or planet. A small tripod or a smartphone tripod adapter is very helpful. If you already have a telescope, it’s usually straightforward to attach most cameras and proceed from there.
Essential post-processing step: image stacking
“Image stacking” commonly refers to assembling a 3D data cube from a series of 2D images. In astrophotography, stacking generally means averaging many noisy (low signal-to-noise ratio, SNR) images taken under the same conditions to produce a single high-SNR image. Stacking reduces random noise and reveals faint detail.
There are many stacking programs available, including free options. Some programs separate workflows for point-source (stellar) images and extended objects (Moon, planets, nebulae)—a single program may not handle both optimally. Smartphone cameras and webcams often can capture video, which provides hundreds of frames quickly for stacking and can yield excellent final results.
Useful knowledge: apparent magnitude
Apparent magnitude is a logarithmic brightness scale that describes how bright objects appear relative to a standard reference. Understanding apparent magnitude helps you set exposure and assess dynamic range. Keep in mind that apparent magnitude and SNR are logarithmic scales, while your camera sensor’s output scales linearly with intensity. This distinction matters in advanced processing, especially when compressing high dynamic range scenes into an 8-bit format.
For more on magnitude systems, see: SDSS magnitudes.
Useful exercise: night cloud photography
To practice focusing and exposure in low light, try photographing nighttime clouds. It’s a simple way to learn how your camera behaves in low light and how long exposures affect image quality.
Useful websites
- Astropix — basics and tutorials
- Basics of Astrophotography (McDonalds)
- Clarkvision — technical photography articles
Next steps
Up next: Part 2: Intermediate Astrophotography
PhD Physics – Associate Professor
Department of Physics, Cleveland State University


Установка оборудования для наблюдения позволит контроль помещения круглосуточно.
Продвинутые системы обеспечивают четкую картинку даже в ночных условиях.
Вы можете заказать множество решений оборудования, подходящих для офиса.
установка камер видеонаблюдения на участке
Качественный монтаж и консультации специалистов делают процесс простым и надежным для всех заказчиков.
Обратитесь сегодня, чтобы получить оптимальное предложение в сфере безопасности.
Great start to your series, I can't wait to read the other installments. :thumbup: